How to make a paperMac by yourself

PaperMac. Just admit that it sounds a bit ridiculous. However, what are the reasons for making Mac paper computer? Well, they can be rather different: if you are just bored, you want to have an interesting activity for children or to make an accessory for your child’s doll, a postcard for an adult high-tech lover or a comic gift.

You see, that only the size changes and the basic step-by-step instructions on how to make Mac by yourself out of paper are the same for all crafts. Obviously, it is not difficult to guess that for a doll and for the child computers of different sizes are needed. If you make a postcard as a gift, choose an arbitrary blank perimeter. An interesting idea is to make a laptop model and present it in a box from a real Mac. However, keep in mind that it is rather advisable to make such a gift only for a person with a good sense of humor. If there are any doubts about the recipient's reaction, do not even think about that.

So as you see there are a lot of reasons for making paper Macs and now this idea doesn’t sound so ridiculous to you. Paper and cardboard are versatile materials for a variety of handicrafts. It is not necessary to perfectly master the technique of origami to make your own paper Mac origami. Nevertheless, some original and funny things can even make a child.


PaperMac

How to make a paper Mac origami. Step-by-step guide

Part 1. Parts Manufacturing for PaperMac

  1. Collect materials. To make a paper notebook, you need two sheets of paper or cardboard of the color that its body will be. You will also need two sheets of white paper, a sheet of cardboard, a ruler, scissors, glue, a pen, and markers or colored pencils. Note: If you want to have a unique design of your paperMac and to make a laptop in a decorative case, take a paper with a pattern instead of an ordinary one.

  2. Select the type of laptop. After collecting all the materials, decide what type your computer will be. On one of the sheets of paper draw the logo of the appropriate brand. For example, draw an apple if you want to make an Apple computer, or put Toshiba inscription if you want to make a laptop of this brand. If you are not good at drawing you can always print the logo.

    • If you're not sure about the model, do a little research and see how your paperMac will look like. So you can make it with the maximum precision.

    • If you are using paper with a pattern, put a logo on its patterned side. Then the pattern will be on the outside (on the laptop case).

  3. Make a desktop. Now that you have a base, you need to make a screen with a desktop. Take one of the sheets of white paper and attach it to the sheet on which the logo is drawn. If they are the same size, measure and trace 2.5 cm on each side of the white sheet, and then cut it. After that draw or paste pictures that will depict the desktop.

    • Try using the desktop of the real laptop as a sample. Draw a colored background, icons and menu bar along the bottom edge.

    • If you can not draw, find a photo that will serve as the background of the desktop, and cut the pictures in the form of icons. A paper Mac origami can display a search engine page, a desktop, or a favorite gift recipient site.

  4. Make the keyboard. Take the second white sheet of paper and attach it to the second colored or patterned sheet. Measure and trace approximately 1.3 cm from each edge, then cut them. After that, line the model of the keyboard on the sheet of paper. Make sure the proportions of the keys match the size of the paper. If you are not able to draw the keys by hand, try to gently place the sheet over the real keyboard and press the paper to the keys so that they print on it. Then you can circle them with a pencil.

    • You can buy stickers with letters and stick them on the marked keys. So all the letters will be of the same type and size, and the keyboard will be more like the real one.

    • If you want to achieve a perfect look, the keyboard itself can also be printed out and not drawn by hand. Keep in mind that it should fit your Mac paper computer.

  5. Make a stand. Since there is no design in a paper notebook that would hold the screen in an upright position, you will need to make a stand. Take a piece of cardboard, fold it in three equal strips. Expand and connect the edges of the cardboard to form a triangle. Glue them with tape: the triangle should keep its shape.

Paper Mac origami


Part 2. Assembling your paper Mac origami

  1. Assemble the screen. You have a sheet of paper or cardboard with a logo and a desktop. Now you need to connect them together. Take a picture of the desktop and apply glue on it on the reverse side, along with the edges and in the middle. Attach it with glue down to the back of the laptop lid, centering it. Press the picture and gently smooth it so that there are no bubbles under it.

  2. Assemble the keyboard. Now you need to take a second sheet of colored or patterned paper and stick a drawn or printed keyboard onto it. Turn the keyboard over and apply glue on it, along with the edges and in the middle. Place it in the center of the color sheet, gently attach and smooth out so that it does not remain a bubble. In one of the upper corners, draw a power button.

    • If you do not want to draw a power button, you can print a picture of it and glue it on paper, as you did with the keyboard.

    • If you want to make the laptop a little stronger, you can strengthen it with cardboard. Glue a piece of cardboard to the top and bottom halves of the laptop. Then glue another sheet of colored or patterned paper on the back of the cardboard so that it does not shine through. After that, glue the desktop and keyboard.

  3. Connect both sides of your paper Mac origami laptop. Now that the screen and keyboard are ready, you need to connect them together. Take both parts and fold the long side to each other. Make sure that both the screen and the keyboard are facing up. Glue the junction with a strip of transparent tape. Turn the glued sheets over and put another strip of Scotch tape on the same place, but on the reverse side.

  4. Install your laptop. Turn the notebook face up again and bend over the gluing line. Turn the fold away from you. Take the stand made earlier and place it behind the glued edge. Open the laptop, as you would open the real one, and lean the lid on the stand to hold it vertically. Your laptop is ready. That is how you can make rather cheap Mac laptops with your children.

List of cool apps for Mac devotees

However, all joking aside. Let’s talk about useful apps for true Mac fans, namely:
Commander One

Commander One

  • Requirements: macOS 10.13. 54.76MB free space.
  • Version 3.11(3925). (26 Nov, 2024).
  • 4.7 Rank based on 889+ users, Reviews(524)
  • Category: Utilities
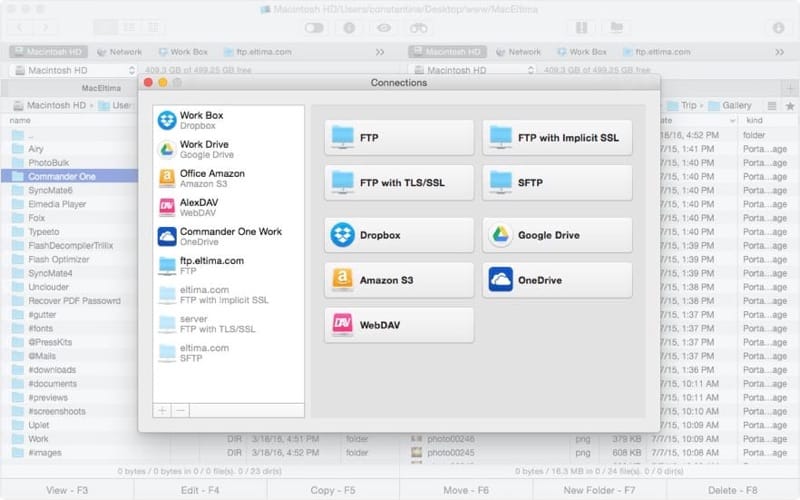
Commander One - if you are looking for a decent file manager with a bunch of advanced features. Have a flawless work with all of the data on your Mac, archive/unarchive files, search through archives without content extraction, etc. Besides that, with such a handy app you can connect any of your Android devices to your Mac as well as iOS devices and manage all the info with ease. In addition to all of the features, Commander One allows you to connect and work with all the files on the clouds and remote servers.
Commander One screenshot
CloudMounter

CloudMounter

  • Requirements: macOS 10.14+. 57.52MB free space.
  • Version 4.10(1706). (19 Nov, 2024).
  • 4.8 Rank based on 436+ users, Reviews(255)
  • Category: Utilities
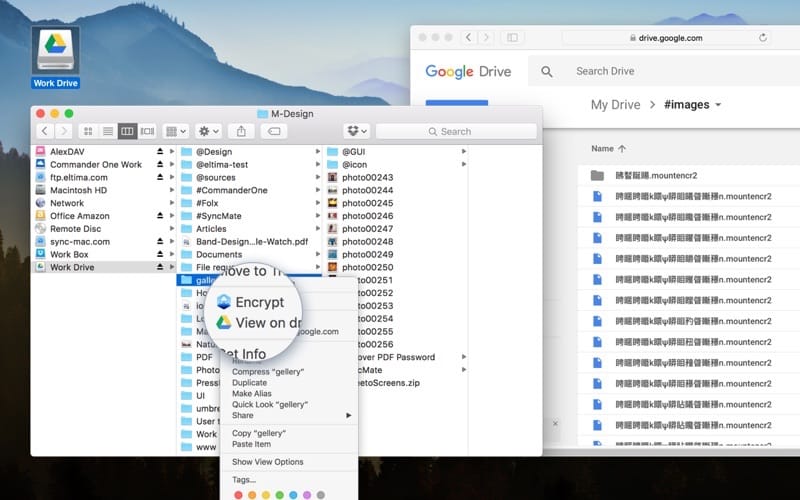
Another app with a wide range of supported cloud solutions and remote servers is CloudMounter. A minimalistic app that is integrated into Finder and allows you to work with the online data as is they were the files stored on your computer. The app can be useful as it does not sync your data to a local computer thus increasing your disk capacity significantly. Besides that CloudMounter uses advanced encryption standard to protect your information.
CloudMounter screenshot
Uplet

Uplet

  • Requirements: macOS 10.9. 21.74MB free space.
  • Version 1.7.384. (15 May, 2020).
  • 4.5 Rank based on 58+ users, Reviews(24)
  • Category: BusinessApplication
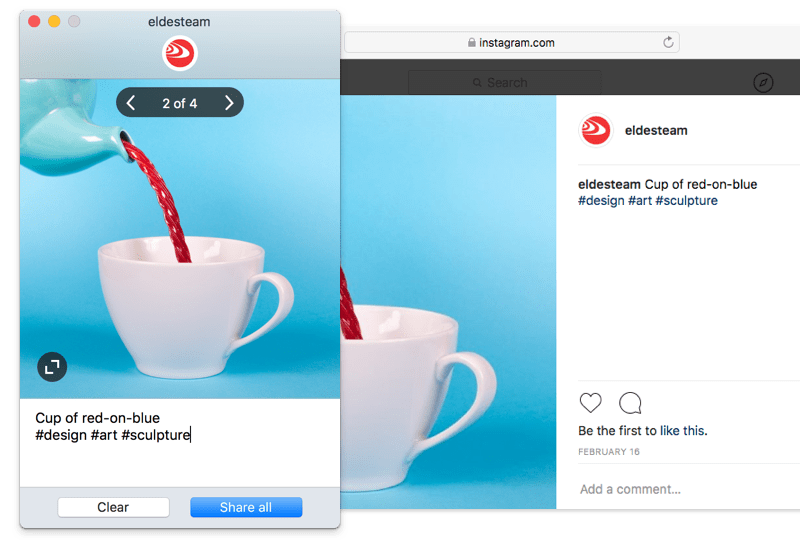
The app will be a cup of tea for users who have a lot of photos on their computer and want to share them on their Instagram account directly from their Mac. Access all your Instagram accounts from one spot. Upload bulk photos and videos and post photos in their original size.
Uplet screenshot
PhotoBulk

PhotoBulk

  • Requirements: macOS 10.10. 15.27MB free space.
  • Version 2.6.328. (12 Jan, 2023).
  • 4.6 Rank based on 334+ users, Reviews(151)
  • Category: MultimediaApplication
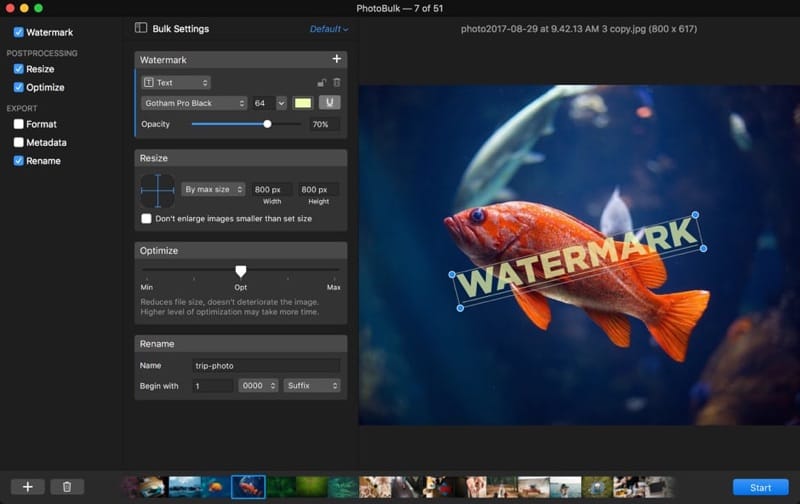
This tool is useful for quick correction and batch conversion of your photos. The program allows you to set certain parameters for several files at once, supports the real time editing mode and allows you to watermark, resize, rename and convert photos to different formats. Rather easy to use, fast and convenient app.
PhotoBulk screenshot